Time and money seem to be at a shortage this time of year. Quick festive ornaments from the garden help with the budget and make pretty decorations. Swags are easy to make as they are essentially a bouquet made of evergreens and such that are tied together with a bow. Just one pine or cedar branch with some ribbon will do for a really simple but effective swag. If you have lots of different types of branches, like I have, combine them for a lush look. A mixture of different types of foliage of conifers (pines, cedar, spruce etc.) with boxwood, rhododendron and other broadleaf evergreen branches steps it up a notch. To make a swag, cut a number of branches approximately the same size. Place the branches on a table and stack them on top of each other. The longest one goes on the bottom, which become the back of the swag, then place shorter ones on top so you can see the layer underneath. Stagger one on top of another so a quarter of the bottom one is uncovered. If they are all the same length and aren't staggered, it lacks definition and doesn't look artsy. Once happy with your arrangement, tie the ends together with wire or a zap-strap. Hang it on the wall and look for any stray and unruly branches. There’s no need to remove them, just snip them off where you need to. Alternately, if you need to add a branch or two, just wedge them inside and push them up into the base of the swag. Even when tied together there's usually some 'give', so adding some small stems isn’t an issue. When done, finish off the swag with a ribbon. Wrap it around the cut ends, hiding the wire and tie it into a knot, making sure the ribbon is long enough that the ends hang down. Cut another length of ribbon and tie it around the base again, but this time make a bow. To make a puffy bow, use a wide ribbon or fabric and cut it two and a half times larger than the desired bow size. Make a circle with the ribbon overlapping the ends. Cinch the middle of the circle together and secure with wire. Cover the wire with another piece of ribbon, tying it around the wire. Attach it to the ends of the swag and puff up the 'bow' part of the ribbon, making sure it looks nice. And that's it. Your done. Have fun trying different ribbon as it will change the entire look of the swag. First I tried some fancy silver and white fabric, then tried a canvas type red ribbon. I liked the natural look better, so I went with the red. A nice big red satin bow would be quite elegant. Add a few baubles or spray paint some funky twigs and the look changes again. A few caveats. If you are hanging the swag on the door or where people come and go, avoid using thorny plants. If placed on a door, avoid dried flowers and berries as they easily fall off with the motion of the door opening and closing and with people passing by. To help prolong the life of the swag, keep it outside, mist it daily or spray it with an antidessicant such as Wilt-Pruf. Hairspray also works if you have any handy.
0 Comments
 A nice thick layer of leafy mulch laid between plants has multiple benefits for the soil and plants.  Cocoa was a big help laying the mulch. Couldn't have done it without her. Cocoa was a big help laying the mulch. Couldn't have done it without her. Cleaning up my garden beds became a priority after a recent bout marred some plants while others succumbed. Plus it's time as it is November. The veggie beds were cleaned up a few weeks ago, but yesterday, I managed to put the rest of the garden to bed for winter. It's a dirty bit of business but necessary if I don't want to inherit the work in spring. There was lots of weeding, cutting back perennials, discarding diseased plant parts, transplanting and applying mulch. It's a great time to move plants around the garden. The air is cool, the soil is still warm and the rain is back in town. I have been busy transplanting those that are either too big, too small, engulfing others, ones that need more light and those that need less. I have also tossed the ugly and the sickly. It happens. Perennials (bearded iris, daylilies, phlox) that have multiplied and have overstepped their bounds were divided and potted up to sell or give away in spring. To finish off the beds, I like to use a nice thick layer of leaves. I got a good haul of them, 20 bags in fact, when I raided my neighbourhood during recycle pick-up day. Ironically at the same time I was applying leaves to my beds, a neighbour was raking up and bagging her lovely Japanese maple leaves that had fallen onto her lawn and garden. I took advantage of a fair weather day by dumping and spreading 18 bags of leaves, mostly from maples, on my garden beds. I think it looks marvelous. I know some people don't like the look, but I do. Besides it is so beneficial to plants and soil. It provides food for the soil food web that everything in the garden depends on. Not only that, winter weeds will be foiled. Erosion won't be an issue even with heavy rains. Plant will be toasty too. A blanket of leaves insulates the soil from temperature fluctuations which dislodges plants roots especially spring flowering bulbs. I'm so glad it is done, and so is Cocoa our kitty, who helped me with the mulching. As you can see she loved the leaves and I swear she actually gave me two furry thumbs up!
 Swiss chard will last longer with a nice thick layer of leaves at its feet.
 This soggy low site is best suited for a drain, a marsh or a pond, not a bench. Perpetually wet soils can be remedied if you know what the problem is. Clay soils retain moisture and drain very slowly. Compacted soils are also unable to drain because that have been squished by heavy loads, parking, and frequent foot traffic. I hope the following information will help you navigate through the quagmire of waterlogged soils. Avoid Sand: It is a misconception that a layer of sand improves drainage but the opposite is true. Sand layers must become totally saturated before they drain to the layer below. It’s much better to mix the sand into the soil rather than lay it on top. Do not add sand to clay soils as it results in concrete. Add Organic Matter: A much better alternative to sand is organic matter. When it’s mixed into clay soils it build soil and adds nutrients, which sand does not. Mix in fir or hemlock mulch, or use leaf mould to break up the clay and to act as a sponge to soak up the water. Mix it in well and then add a 3 inch layer of an organic mulch over top of the soil. The mulch protects the soil and reduces erosion. Add Lime: Wet soils don’t retain calcium so they benefit from the addition of lime. Avoid fast activing lime as it’s known to burn soil and plants. Use Dolopril, a coated lime product that is slow release and easier to apply. Before adding any type of lime, get a soil pH done. Low Areas: Sunken spots collect water, but should drain in a day at most. Filling in the depression with soil is a good way to prevent puddling. For serious low spots that don’t drain convert the area to a pond, bog garden or a rain garden. Drain the Soil: Another option, is to install a trench (French drain) to move the water away. It is simple but very effective, permanent solution. This low tech method removes water from an area by using a trench and gravity. Look below for construction tips.  An open trench is another way to deal with excess water. Plants that don't mind wet feet Rodgersia pinnata. Plant! If you want to go with the flow, so to speak, add plants that don’t mind wet feet. They will also help dry things out: goat’s beard (Aruncus dioicus), Astilbe, water avens (Geum rivale), Gunnera, Japanese iris (Iris ensata), Siberian iris (Iris sibirica), Ligularia, Rodgersia, redtwig dogwood (Cornus sericea), river birch (Betula nigra), swamp maple (Acer rubrum), Persian ironwood (Carpinus persica) and willow (Salix).  Gunnera manacata.  Cornus sericea, red twig dogwood.  Iris siberica, Siberian iris.  Astilbe chinensis 'Pumila'.  Aruncus dioicus, goatsbeard. French/Trench Drains
 Roll back the existing lawn to dig out a trench. Placing the soil on a tarp makes it easy to dig out the trench and replace the soil when done. No more lifting the soil into a wheelbarrow and dumping it when full. Soggy soil, saturated beds and floating lawns are a result of poor drainage. A French drain is a simple, low tech method to removing water from an area by the use of a trench and gravity. You will need:
An Open French Drain
 The Arizona-Sonora desert is green and alive with plants and animals.
I could write about all the wonderful, educational, intriguing beautiful gardens with their plant collections and features, but it is expertly explained on their excellent websites. And since pictures say a thousand words, I thought I would let my pictures do the talking. the tucson botanical gardens A beautiful mesquite (Prosopis sp.) lined path. This opulent and educational five-and-a-half acre botanical garden beats in the heart of Tucson. They have many garden collections to educate, enlighten show the history of agriculture in the area, the history of its indigenous peoples: Cactus & Succulent Garden, the Herb Garden, Xeriscape Garden, Zen Garden, Shade Garden just to name a few. I was delighted to meet lots of lovely butterflies at the Cox Butterfly & Orchid Pavilion, but it was the metallic blue poison dart frog that was a pleasant surprise. For more information and features click on The Tucson Botanical Gardens.  A Blue Poison Dart Frog.  A traditional shade ramada is made from Ocotillo plant.  A botanical collection of cacti is artfully arranged.  A desert Zen Garden at the Tucson Botanical Gardens.  This grouping of Golden Barrel Cactus (Echinocactus grusonii) are the focal point in this cacti garden.  Old Man Cacti (Cephalocereus senilis) stand tall adding vertical drama.  A regal fountain provides water to the local wildlife.  A lush herb garden is one of many food gardens in the Tucson Botanical Garden.  A 'trellis' made out of old an old bedspring mattress is an innovative recycling idea.  Pomegranates seem to love the conditions at the Tucson Botanical Gardens.  A Tucson Botanical veggie garden.  A Mammillaria klissingiana cactus cluster.  Mexican Lime Cactus, Ferocactus pringlei, spent flower blossoms are still colourful.  Paper-spined cactus, Tephrocactus articulatus var. papyrancanthus, looks like it is covered in paper streamers.  Flowers from the Townsend Barrel Cactus, Ferocactus townsendianus.  Orange Jubilee Bells,Tecoma alata 'Orange Jubilee' flowers.  The flower of the Desert Willow, Chilopsos linearis.
 Clark’s Spiny Lizard, Sceloporus clarkii is camouflaged so well, it is practically invisible.  A butterfly feeding station at the Cox Butterfly & Orchid Pavilion,Tucson Botanical Gardens.  A butterfly feeding on nectar from a pink penta flower.  This Queen Owl Butterfly has exquisite blue wings when they are unfolded.  A Postman Butterfly sucks nectar from a red hibiscus flower.  Monarch butterflies gather on the windowsill of the Cox Butterfly & Orchid Pavilion. The Arizona-Sonoran Desert museum The view from one of the many paths that weave through the desert gardens of the Arizona-Sonora Desert Museum. This immense 98-acre living museum features animals as well as plants. Over 1,200 plant varieties and more than 230 animal species are displayed in their appropriate ecosystems. Research, conservation and education is their obvious objective. The Hummingbird Avery brings hummingbirds close-up and personal. Their plant collections included Desert Grasslands, Palo Verde Trees, Cactus Garden and Tropical Deciduous Forest were a few of the generous and sprawling gardens. For more information and features, click on The Arizona-Sonora Desert Museum.  Do you spot the coyote smiling at the camera?
 A hummingbird taking a quick break long enough for me to make this shot. They are so fast!  The Earth Sciences Center features an underground cave that exhibits a beautiful mineral collection and many more delights.  A Hemimorphite mineral sample.  Along the covered walkways are excellent demonstrations and exhibits explained by the many docents of the museum.  Cholla cacti, Cylindropuntia sp., look furry in the Arizona sun, but they are very prickly.  The red spines of the Mexican Lime Cactus, Ferocactus pringlei.  This covered raised walkway provides spectacular views of the garden and beyond into the desert.  A planted desert garden showcases the many plants that thrive in this harsh climate.  A crested saguaro cactus, Carnegia gigantea forma cristata.  An ocotillo cactus on the left and a baby saguaro cactus on the right, frame the desert beyond.  This Ironwood tree, Olneya tesota, is over 200 years old - just a baby compared to other ironwood trees.  A velvet mesquite tree, Prosopis velutina. 
If you admire the look of tropical plants in the garden but live too far north, you can bring the tropics to your garden with hardy banana plants (Musa basjoo) and Chinese windmill palms (Trachycarpus fortunei) in the temperate zones of 7 and 8 in British Columbia, Southwest Ontario and parts of the Maritimes. Although these plants are tough cookies and can be left outside all year long in the warmer parts of Canada, they still need winter protection. If they are not too big, bring them inside and use them as houseplants. Place in front of a sunny window and water when needed. Don’t keep them too dry as that promotes spider mites, whilst keeping them too wet promotes rotting. If you don’t want to use them as houseplants, an alternative is to store them in a basement with grow lights, in a heated garage or greenhouse. Check on them often to make sure they are not too dry, too wet or having health issues. If your container grown banana or palm trees are too big to bring inside, there are ways to protect them. Container grown plants are more prone to winterkill since their roots are in pots and are not protected by the thermal heat of the earth. If you can bury their pots in the ground, do so, or wrap the pots with insulation, layers of cardboard, carpets, anything that will insulate them from the cold, the wind and temperature fluctuations. Place at least 6 inches of leaves, mulch, straw or even soil over the crowns (where the stem meet the roots). Follow the rest of the instructions below to protect the upper portions of the plant Protecting Banana Plants outside Cut off all the banana stems from the plant and place them on top of the roots to insulate them. There is no need to try to protect banana stems as they are just temporary anyway. Technically, banana plants are herbaceous perennials, which means they are non-woody. New stems arise from the underground rhizomes (similar to bamboo, iris and grasses). Once the new stems produce fruit the stem collapses and dies, so don’t panic when this happens; it will be replaced soon enough. Therefore we are not trying to protect the stems, but the roots. As long as the roots are alive, new shoots will energetically emerge in spring. To protect their roots/rhizomes, cut off any stems and cut them into 1 foot pieces. Surround the root area with a cage made of chicken wire or hardware cloth to make a tube a few feet high or higher. Lay cut up banana stems and leaves of top of the roots inside the cage. Add more layers of fall leaves or straw if you wish. If they are located in a sheltered location where they don't receive rain, check on them often to make sure they are receiving adequate water. Plants drying out during the winter is just as bad as sogging out too wet Protecting Palm Trees outside A palm's growing point, where the new fronds appear, must be protected from killing frosts. The most tender and important part of a palm tree is the central bud that grows at the very top of the plant. If that dies, so does the rest of the plant no matter how toasty warm the roots are. That central bud is where all the new foliage originates from. An easy way to protect that growing tip is to gather the surrounding fronds and tie them together over the bud. Continue to wrap with many layers of burlap, cloth or other breathable fabric. Don't wrap too tightly though as this reduces the insulating effect of the fabric. Protect the crown and roots with at least 6 inches of organic mulch such as leaves, straw or wood chips. Wrap the base and trunk with a breathable fabric, fiberglass or even cardboard. If the palm is small, protect it with a cage as mentioned with the banana. For a simple fix, tie the top fronds together with twine then wrap them with non-LED Christmas lights. The heat from the old fashioned lights should keep that central bud adequately warm. Rain & Rot
In our rainy climate of the Pacific Northwest, the fear of plants becoming rain sodden and rotting underneath their winter protection is a concern, so they are often put under the eaves away from the rain. This is a good idea as they also receive protection from the house, however, if the soil dries out, this also promotes winter damage. Check on them occasionally and add water if and when it is needed. Plastic is often added on top of insulating fabric or even used alone to keep the relentless rains from rotting the plants, however, since plastic doesn’t breath, it holds any moisture in. This actually promotes decay and has little insulating value. To prevent soggy fabric, place plastic over top of the fabric etc., but poke a many holes in the sides to let air flow. Good luck with your tropical plants this winter. Cross your fingers that Old Man Winter will be kind to us.  This veggie garden was once lawn, but was quickly transformed into a veggie bed with no digging. I no longer dig up the lawn to make a new bed, instead I make a raised bed right over top. Not only is this method easy, it results in a nice fertile soil. Removing the grass not only is time consuming and painful, it also takes away all kinds of beneficial microorganisms and organic matter from the soil.
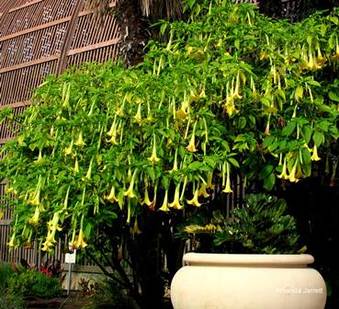
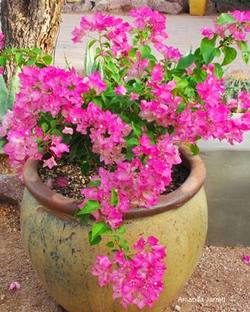
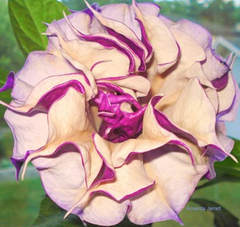
 The mulch layer should be at least 3 inches deep.  I use my geraniums as houseplants during the winter. 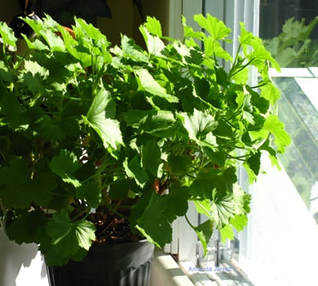 Place geraniums and other tender tropicals, in front on a sunny window or under grow lights. Place geraniums and other tender tropicals, in front on a sunny window or under grow lights. Bring houseplants and tropical plants (tuberous begonias, fuchsias, geraniums, angel trumpets (Brugmansia, Datura), bougainvilleas, coleus) in September that have been vacationing outside, inside - as their vacation is over. Fetch them in now while they are still looking good. If you wait too long they are overcome with diseases and insects and often fail to survive. There are three ways to overwinter plants: overwinter as houseplants, place them in dormancy, or take cuttings. The type of plant determines how to overwinter them. I have to warn you that bringing in plants from the outside is a bit messy. They drop their leaves and flowers in protest to the new environment, but after the initial shock, most should sport new growth in no time. Before you bring them in, wipe down their pots and drainage trays with soapy water; remove dead and infected plant parts, flowers, flower buds, weeds and debris from the soil surface and any free loading slugs and bugs. It is not necessary to repot the plants, but if you do, use potting soil, not garden soil as it contains pathogens. Cut back each stem by a half to a third. Propagate those cut stems if you wish to make more plants, as they will make great cuttings. Wash the plants with dish washing liquid in lukewarm water by squeezing a soapy sponge all over them. You can also spray them with soapy water but make sure you get every nook and cranny. For small plants, dip them upside down in a bucket or sink full of soapy water. Allow them to drip dry. Quarantine these new plants from other houseplants as also from each other so any bugs or diseases don’t spread. Once plants are cleaned up, move them to a bright sunny window or under grow light. Use a timer to keep the light on for 8 to 12 hours. Water plants with lukewarm water thoroughly wetting the soil. Water again when the top ½ inch of soil is dry to the touch. If plants grow but are leggy, weak and pale they are not receiving adequate light. If plants become mottled, pale and dusty with wee spider webs, water more often as spider mites love dry soil. Get a magnifying glass and look under the foliage for tiny spiders. Wash the plant with a soapy sponge or dunk into a bucket or of lukewarm soapy water.
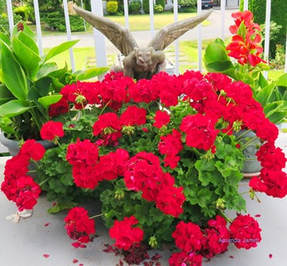 This planter of geraniums is 5 years old and still growing strong. This planter of geraniums is 5 years old and still growing strong. Storing Geraniums For geraniums planted directly in the ground, dig them up and shake off as much soil as possible. Use a good draining potting soil. Add sand and/or vermiculite to aid in drainage if it’s too peaty. Hang them upside down or place them in paper bags and place in a cool, dry, frost free area. Mist their roots weekly. All their leaves will fall off, but their stems should remain intact. In late February or in March, remove any dead parts, shriveled sections and discard any dead plants. Soak their roots for a few hours before potting them up. Water after planting then place in a bright location for a week. Once new growth emerges place them in full sun and allow soil to dry slightly before watering as they rot in wet soil. Tender Fuchsias: Save fuchsias by bringing them inside or bury them outside. Keeping them outside during the winter depends on how far north you live. If you live in cooler zones from 1 to 6, bring them inside. Store in a cool dry place, 4-7°C (45-55°F) - a basement works well. Water every 3 to 4 weeks to moisten the soil, but don’t soak it.  Save fuchsias either by treating them as houseplants or bury them in the garden. To overwinter fuchsias outside, bury them in the garden, pot and all. Cover them with 3 to 4 inches of soil, fallen leaves or another mulch and mark the location with a stake. Dig them up in spring after the danger of frost has passed. Although they may appear dead, they should sport some new growth once unearthed, watered and given light. Wipe off the pots, water and place in a sunny location away from frost. When new growth emerges repot them into the same pot with fresh potting soil or a bigger pot if needed. Mix in a slow release fertilizer and bone meal, according to the manufacture's instructions. Water and keep them away from any lingering frost. Plants suited for Winter Dormancy
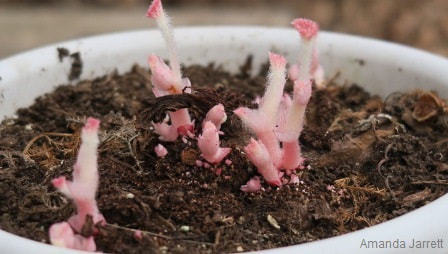
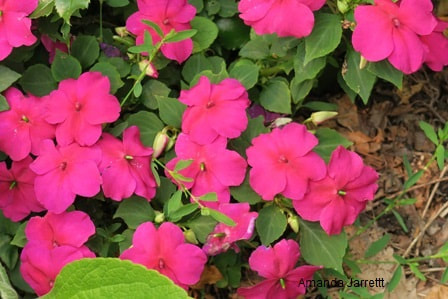
 Cannas can be stored and saved overwinter when grown in cold climates. Overwinter through dormancy: . Some plants such as cannas, tuberous begonias, gladiolus, dahlias, ginger, sweet potato vine, elephant ears (Colocasia, Alocasia) and caladiums, can’t tolerate northern winters and they also require a dormant period. Allow them to be nipped by frost before bringing them inside. This gives them time to send their food and water to their roots. There’s no need to repot potted plants. Just clean the pots and plants with soap and water and place in a cool, frost free, dark location. Keep the soil dry, but don’t allow it to dry out too much that the soil is pulling away from the pot. For those pot-less plants that where dug up from the garden, allow them to dry for a few days. Remove any excess soil then place in cardboard boxes, pillow cases or paper bags and avoid plastic tubs or bags as it promotes rotting. Dust the bulbs with cinnamon to prevent fungi, then cover with vermiculite, perlite, peat or potting soil. Place in a frost free location. Check them monthly and remove any rotting ones and add moisten if they are shriveling. Taking CuttingsThere are many plants including annuals that are easy to propagate as cuttings and you can keep them inside as houseplants until spring, where you can plant them outside. These plants include impatiens, coleus, geraniums (Pelargoniums), sweet potato vine, wax (fibrous begonias) and most bedding plants (annuals). Take cuttings from healthy plants, while they are still actively growing and not declining. Each cutting should contain 4 to 6 nodes (bump-like buds along the stem). Cut the stem just under a node then remove any lower leaves, flowers, seed heads and the tip (growing point) of the stem. Place 3 to 5 cuttings in one pot filled with moist sterile potting soil that’s not too peaty. Add vermiculite or sand if it is and mix well. Water gently with lukewarm to warm water and place in bright room out of direct sun. If you wish, mist a few times daily or place them in a clear plastic bag blown up and secured to keep the humidity in. Once new growth begins, pot each cutting in its own 2 inch pot filled with potting soil. Water gently and keep out of full sun for a couple of days. For more on taking cuttings click here.
 If you have garden questions that you need answers for, register for Amanda's workshop at Lee Valley Tools in Vancouver called "Turn Your Brown Thumb Green" on Thursday, September 21, 9:30 am to 1:30 pm.
To register call: 604-261-2262, fee is $45.00, proceeds to the United Way. Bring your garden pictures, plant samples, garden plans, blueprints and all your garden and plant questions. Let's get your garden to work for you. For more information, click on this link: Lee Valley Tools  A white spider on a robin's plantain, Erigeron pulchellus. If you have issues with spiders, imagine how they feel about us - we are these giant monsters that are bent on destroying them and their homes, but hey – they’re just doing their thing. September is not a good time for those with arachnophobia. Spiders are out and about and are looking for love. While summer is winding down, spiders are gearing up. They have mating on their minds and they are weaving their webs everywhere. Males are in search for that perfect mate, but they have to get on with it as the subsequent eggs have to be laid before winter approaches. Despite the fear they evoke in many people, spiders are a necessity as they eat lots and lots of insects. That’s their job and they do it very well. Not only are they insect eating machines, their webs are highly touted by hummingbirds as their silken fibres are used to make their wee nests. There is no need to love or even like spiders, but give them a break as they are protecting your plants from other bugs. And they are kinda neat looking too - as long as they are not crawling on me when I'm in bed... argh... I just hate that!  A spider in their web lookin' for love or for prey...  Morning dew highlights the many spider webs.  A spider with its prey.  Orange-colored European garden spider, Araneus diadematus  Orange-colored European garden spider, Araneus diadematus.  Baby spiders emerging in May.
Late Blight
If your tomato plants are not looking healthy, they could be suffering from a disease called Late Blight (Phytophthora infestans), which also affects potatoes. This disease has been around for a while as it was responsible for the infamous Irish potato famine in the 1800’s. Late blight is quite common this time of year. The obvious symptoms appear first on the lower, older leaves. Foliage develops large, brown blotches that soon turn droop, turn a light tan and become crispy. On the stems it appears as brown splotches. The tomato fruit develop dark brown circular spots that become mushy. As the disease progresses, a white fungal growth appears on affected areas. This disease works quickly and soon entire plants succumb. The best thing to do is to pull out and discard infected plants and certainly don’t compost them. Fog and morning dew promotes this disease, which we can do little about, however it is prudent not to get the foliage wet when watering. To prevent this disease, water in the morning, rotate crops, especially between tomatoes and potatoes crops. Wait at least a couple of years, preferably four, to ensure there is no cross contamination. Cracked tomatoes Uneven watering is the reason why cracks appear in tomato fruit. Dry soil followed by a thorough soaking makes the tomato fruit to grow too fast; too fast for its own skin. Thin skinned tomato varieties are especially prone to this condition. Try to keep the soil evenly moist. Container grown tomatoes benefit greatly from having a large drainage tray underneath them. A 3 inch layer of mulch on top of the soil, even ones in containers, helps to keep soil moisture more constant. Blossom-end rot Blossom-End Rot appears on the bottom end of the tomatoes. It becomes flattened or sunken, brown and leathery. This is not a disease, but a lack of calcium in the soil. The two main reasons why the plant cannot absorb calcium are inconsistent watering and soil that’s too acidic. Inconsistent watering, especially drought, prevents the distribution of calcium throughout the plant. Tomato plants grown in containers often suffer this malady as keeping the soil consistently moist is tricky during the heat of the summer. Soil that is too acidic also prevents calcium absorption. Tomatoes prefer a pH of 6.2 to 6.8. Add dolomite lime to increase soil pH and as an added bonus, the lime also contains calcium. Work the lime into the soil, following the manufacturer’s instructions, then water well. Crushed eggshells mixed into the soil is also a great idea. Add them to your compost bin and apply the finished compost to your veggie beds and containers yearly. To prevent this condition check soil pH in spring and apply dolomite or dolopril lime according to direction. Apply a mulch, keep soil evenly moist, avoid soil from drying out, avoid high nitrogen fertilizers as it ties up the calcium in the soil and avoid hoeing close to roots. If growing in pots, make sure the container is larger enough that it doesn’t dry out repeatedly and include a good sized drainage tray. Verticillium Wilt
Wilting tomato plants may not be thirsty; they may be infected with the fungal disease, verticillium wilt. A good indication that the wilting is due to this disease and not a lack of water is moist soil (duh). Often only one side of the plant is affected and the plants recover at night. Look for yellow blotches on the lower leaves that may curl inwards. As the disease progresses, the leaf veins turn brown followed by dead spots. This fungi prevents water from translocating throughout the plant and contains a toxin that kills and starves plant tissues as it spreads. Plants not only wilt and discolour, they become stunted and fruit, if any, are small, yellow and don’t develop. A good indication of this disease is inside the stem. If it has a dark centre when severed, it is verticillium wilt. Tomatoes are not the only vegetable prone to this disease. All members of the tomato family are vulnerable: potatoes, peppers and eggplants (aubergines). Once a plant is infected toss it in the garbage as there is no control. Since this fungi enters the plant through the roots from contaminated soil, remove plants as soon as they become infected. Remove all the plant parts from the area so they don’t re-contaminate the soil. Don’t put them in the compost. Rotate your crops. Don’t plant tomatoes, potatoes, eggplants and/or peppers in the same bed for at least 4 years! This is why I had to make another veggie bed, just so I could rotate my crops more efficiently. Plant tomatoes in well-drained soil and don’t overwater as this encourages this disease. Just one day of saturated soil will incur infection especially if combined with cool soil: 13°C (55° F). Plant resistant varieties. When purchasing tomato seeds and tomato plants look for the initial V at the end of the tomato’s name: Tomato - New Yorker (V). This indicates that the variety is resistant to verticillium wilt. That doesn’t mean it will not become infected if it is grown in contaminated soil. And, if all else fails, solarize the soil. Decontaminating soil with SolarizationSoil contaminated with fungi, diseases, insects and weeds cause lots of heartaches for gardeners everywhere. Using the sun to 'bake' the soil is a non chemical, organic approach to kill soil nasties. Just till or dig the bed, rake level, water, level again ensuring a smooth surface. Place a sheet of clear plastic overtop and secure with pegs or soil from another non-contaminated bed. This is best done in the summer to heat the soil adequately. Keep them soil covered for at least 6 weeks.
Remove the plastic and add some goodies to replenish the soil since solarization kills practically everything. Add a few inches of compost, SeaSoil and/or composted manure to replenish what was lost. Mix it in to the top 6 inches and water. Wait a few days to a week to plant. My car is covered with a sticky substance because I parked it under a tree dripping with gummy, tacky goop. Many believe the tree is oozing sap, but it’s not. It’s actually much grosser than that. It’s actually the secretions of zillions of aphids that are feeding on the poor tree. As the aphids suck out the tree’s juices, they excrete a sticky and smelly substance called honeydew. This sweet gummy stuff attracts ants, which ‘farm’ or ‘milk’ the aphids for their honeydew by stroking the aphid’s abdomen. Probably too much information for you there – sorry. The honeydew also attracts a fungus called Black Sooty Mould. It looks like the name implies - black soot - and it covers the leaves. It doesn’t cause too much harm to the plant other than blocking out the sunlight. It’s the aphids that are the problem. Symptoms first appear on the foliage as they become coated with this thick, glossy and clear honeydew from the feeding aphids. It soon coats all the leaves, dripping onto anything below. It covers sidewalks, cars, plants and anything or anyone that lingers too long.  Which Trees Are Susceptible
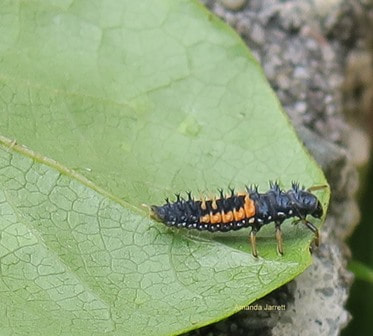
 preventionSome trees are really prone to aphid infestations, but it does depend on the type of tree, the climate, the tree’s health as well as its maintenance. For example, lindens, also known as Lime trees, are grown extensively in England, but don’t seem to suffer like the ones grown in British Columbia. The lindens grown here in BC, are predominantly the Little Leaf Lindens (Tilia cordata) and they are savaged by aphids. I was impressed with a perfectly healthy huge Silver Pendant Lime tree (Tilia tomentosa 'Petiolaris') at the Jephson Garden, Leamington Spa in England. Was it the tree variety, the climate, the soil or superior maintenance? I think it was a combo of all those factors. Meanwhile, back at home in my neighbour’s adjoining front yard, her variegated tulip tree, Liriodendeon tulipifera 'Aureomarginata', is dripping a fine mist of stickiness on everything below it. It’s adjacent to my driveway and I warn people not to park near it. All the plants at its feet including a rhododendron, star magnolia, rose and spirea are covered with the sticky stuff. It sucks – or should I say, the aphids do. At the beginning of the growing season, this tree is in good health with no aphids in sight. You’d think that the aphids would be feasting on the new succulent growth, but alas they are not. Is this due to the tree having adequate water? It could be. As summer heat and lack of rain takes over, all plants including trees suffer. This lowers a plant’s resistance, which results in insects honing in on the weakened tree.  What to doFirst off, keep trees watered during the summer. Soak the soil to about 12 inches to beyond the drip line (where the canopy ends), once a month. Lay a hose on good trickle for about half an hour a couple of times a week. Avoid watering at the base of the trunk as it may cause the trunk to rot. Keep moisture in the soil by applying a 3 inch layer mulch under the tree on top of the soil, pass the canopy (dripline). Avoid placing it against the tree trunk to prevent rotting. If it the tree is planted in the lawn, it is not going to do as well as compared to having its own bed with mulch. controlSpraying huge trees with any kind of anything is impossible and very impractical. If the tree is small enough to coat it thoroughly, soap and water is effective, but you must reapply in 7 days to kill their offspring. Fun time. Another control is dormant oil applying in January or February just before the tree buds out. A dormant oil, lime sulfur combination is an effective control for overwintering insects and diseases. Follow the directions to the letter and go for complete coverage. This is a relatively low toxic method that is often used for organic pest control. Ladybugs Rule!If you have an aphid infested tree, inspect it closely for ladybugs before spraying with anything, including soap and water as it will kill them too. Ladybugs take many forms so be aware of the different stages in their life-cycle: eggs, larva, pupa and adults. The larva and pupa look nothing like the adults. The larva are shaped like an alligator while the pupa resemble bird droppings. There are lots of ladybugs, their larva and pupa on my neighbour’s tulip tree. They were doing a happy dance as they feasted away. Spraying is not an option as I know these beneficial insects are doing the job for me.
My lesson is learned though as I can’t control the aphids so I’ve just got to remember to look up before parking!
I thought I would share our balcony with you as it such a blissful spot. This moment was captured at the end of the day, right after dinner. Our deck is an active one, not just for us and our two kitties as we have numerous pots hosting veggies and flowers. I must admit that harvesting veggies off the deck is very convenient. The lettuce is doing great and so is the kale, especially the ones planted with the Portuguese laurel tree. This sapling was once a weed in my sister's garden, probably deposited by a passing bird. I eagerly took it home and potted it up and surrounded it with petunias, calibrachoa (million bells) and garden frills kale. Looks good so far despite wilting numerous times from lack of water. I had to move it to the other side of the deck as I just couldn’t keep up with the watering. It is now tucked in the dappled shade of our neighbour's tulip tree and much happier with the extra shade. The deck faces northwest, with the tulip tree casting much needed flickering shade that moves as the setting sun glides to the west. Here are some pics of the planters on our deck in the form of a slide show. Check out the Firecracker pink geranium. It has crazy petals, the double blue bacopa and the million bells are ever-so lovely. Cheers, Amanda If you would like to receive an email of my blogs, please fill out the form below. Thank you.  The Dunbar Garden Club garden tour provided lots of inspiration and great ideas. Photo of J. Dixon's garden. I recently had the privilege of attending the Dunbar Garden Club private garden tour. All four gardens were incredibly beautiful and so very different from each other. I saw wonderful plant combinations integrating exciting colours, the integration of differing plant forms and textures from bold to delicate lacy things. It was not just pretty gardens, but it was a learning experience. There were so many great ideas such as using chairs to stake plants and the artistic solution of painting a boring fence with a colourful mural. Such talent and imagination! A heartfelt thank you to the Dunbar Garden Club for this wonderful garden experience and a special thank you goes out to the members that opened their garden gates to us. It was my pleasure! Since pictures speak louder than words, I have a picture gallery to show off these beautiful and innovative gardens. Hope you garner some great ideas like I did. Cheers, Amanda B. Bone
D. stag
J. Dixon
Runcie & Peters A rain splashed David Austin rose called Graham Thomas.
 The Lined June beetle is nearly the size of my finger. Ten-lined June beetle (hissing beetles, watermelon beetles)
I found this huge beetle upside down, legs flailing, on my office carpet struggling to right itself. Talk about taking the wrong turn! I had no idea what kind of beetle it was other than it was big, and not too smart. Research was in order, so this is what I found out. It is a Ten-lined June beetle (Polyphylla decemlineata) and it’s Native to North America. This large 1 inch (2.5) brown scarab beetle bears distinctive numerous white lines down its back. When disturbed it makes a hissing sound, although I didn’t hear anything when I retrieved it from my office. Maybe it was just too verklempt. Their larva are similar to chafer beetle larva, as they are close relatives. The C-shaped grubs grow up to 2 inches with creamy white bodies and 3 pairs of legs situated near their brown heads. The grubs live in the soil and feed on plant roots. Infested plants wilt, even with adequate water, and are stunted. The adults are nocturnal and hide among the plants during the day, but they do not feed on them. At dusk they seek out mates then hover around lights come nighttime. The adults emerge in late June through July in British Columbia and the Pacific Northwest. To control cultivate the soil to expose the grubs, discarding them as you go. The birds and other critters will help you control them as they seem to think they are quite tasty.  It has been a good year so far for the veggie garden. The lettuce has been stellar. My harvest basket includes French Breakfast radishes, leaf lettuce, head lettuce, broccoli, purple broccoli, Swiss chard, 'Lacinato' Italian Heirloom Kale, Garden Frills kale, basil, thyme, fennel, strawberries, nasturtiums & roses (as they are both tasty on a salad).
It is strawberry season and there is a battle between who gets to eat them first: me or the slugs. Slugs always seem to get to my strawberries before I do, which is why I thought I would thwart those slimy creatures with planting a few strawberry plants in an old leaky birdbath. It was better than chucking out the old thing. My only issue is that it needs to be a tad deeper as I have to water it more often than I care to. I am impressed that there already strawberries dangling over the rim. Easy pickings for us but not so much for those darn slugs. Since I am the lucky owner of another leaking birdbath, I jumped at the offer of some hens and chicks (Sempervivum tectorum) plants from my kindly neighbour. I thought they would look rather nice perched atop a birdbath with their ‘chicks’ cascading over the edge. We’ll see how that works. They should do better than the strawberries as they are succulents, which don’t mind drying out if I fail to water them as often as I should. Hey, nobody is perfect and sometimes life just takes over. In fall, these captured and suspended strawberries, as well as the hens & chicks, will have to come down to earth. I plan to unscrew the top of the birdbath and set them in the ground. They probably wouldn’t survive the winter without the thermal heat of the earth to keep them cozy. In the meantime, I will see how this works, especially with the watering issue. After all, it is an experiment and just a bit of gardening fun. Cheers, Amanda 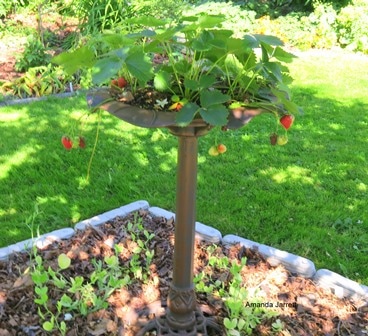 As you can see, the birdbath isn't very deep, but the strawberries don't seem to mind as long as I keep up the watering. Sure wish it would rain....  Dangling ripe, slug-free strawberries. They don't seem to make it into the kitchen though.  Hens & chicks like it hot and dry so logically, they should do better than the strawbs.  Proven Winners Oso Happy Smoothie landscape rose. Proven Winners Oso Happy Smoothie landscape rose. Although roses get a bum rap for being a pain to grow, there are many that defy that description. Hybrid tea roses are responsible for such a sullied reputation as they often succumb to many rose maladies: black spot, powdery mildew and aphids. Even with the recommended 8 hours of direct sunlight per day, perfect fertile loamy soil, good drainage and adequate air circulation, many hybrid teas become ugly. But not all roses are the same. Species roses are wild roses, untouched and unaltered by plant breeders. They grow on their own roots and are not grafted like the hybrid teas. This makes them hardy and more pest resistant especially when grown in their native habitat. The Nootka rose for example is from Nootka Sound in BC. Other common species roses include Lady Banks’, Alberta, Musk and the Multiflora rose. Not all grafted roses are high maintenance as many floribundas, polyanthas and grandifloras are quite reliable. Do you research before you buy. Miniature roses are also surprisingly hardy and pest resistant. They are grown on their own roots and are often sold as gift plants for Mother's Day and Valentine's day. Usually there is 4 in a pot to make a nice show. Plant them outside individually and watch them grow into lovely perfect little rose plants. Other easy care roses are Old Garden roses: Alba, Centifolia, Damask, Gallica, Moss, China, Bourbon, Hybrid Perpetual, Noisette and Tea roses. Some (but not all) bloom only once, but when they do, they drip with beautiful and bountiful blossoms. Flowers are usually deliciously fragrant, come in a myriad of colours and either bear 5 petals to blossoms bursting with them. Some bear attractive colourful hips come fall, which also feed hungry birds during the winter. Worthy of a mention are shrub roses Hybrid musk and the Rugosa rose. They are also easy care and bloom more than once, are fragrant, bear nice rose hips and tolerate partial shade. Trademark roses are the new kids on the block, relatively speaking. Hybridizers and breeders have worked diligently to develop continuous flowering 'landscape roses' that are pest free, hardy and dependable. The Canadian Explorer Series, Parkland Roses, Meidiland Landscape Rose, Flower Carpet Rose, OSO Easy Roses by Proven Winners and Knock Out roses take the worry and stress out of rose growing. If you love roses and have stayed away from growing them due to bad experiences, try your hand at growing one of the easy care roses. For more information refer to my article on Types of Roses on The Garden Website. Cheers, Amanda 'Plant Nuts', like myself, often succumb to beauty instead of logic. I surrendered to the allure of the fluffy light pink, frilly flowers of the Shirofugen ornamental flowering Japanese cherry. I can’t blame anyone but myself for picking out such an unsuitable tree for the backyard. I did check its mature height and width before purchasing and I knew it was going to be a bit tight with a canopy of 20 feet, or so I thought. I recently found out that in these parts of the world, their canopies often reach 30 feet – oops! And, if it’s planted in an ideal location, it will grow with gusto becoming bigger than the norm. Apparently, that place is in my back yard… It is so happy there - engulfing the garden. For a 6 year old tree, it’s quite impressive for its age. It has grown fast, very fast, like it’s on steroids. I would be happy with my Shirofugen if size was its only issue, but the roots send out suckers – everywhere – argh! – up to 50 feet away! This tree also has some serious roots that erupt out of the ground. Now the backyard is an impressive obstacle field as it is full of tripping hazards. Since plants are my thing, I am not ignorant of the issues with ornamental cherry trees; I know they are shallow rooted and their roots tend to be hazardous. I also know that they grow fast but I really miscalculated this tree’s zest for life with raised roots the width of 2 by 4’s. So why is this tree such a monster? Well, it’s not just happy in its space, it is also grafted like most flowering cherries. I suspect it’s rootstock is rambunctiously dominant. This explains the huge roots raising up the lawn and the suckers that appear far away from the tree itself. It also explains the size of the canopy and its ultra-fast growth. Due to the fact that we can no longer walk near and around the tree without stumbling, it has to come out. It is such a sad, sad thing to remove it, but it is just too dangerous, and the suckers everywhere are a real pain. They are coming up into the veggie beds – such horrors! But it is a beautiful tree and we will miss its gorgeous flowers that smother their branches with their loveliness. It is always a sad time when trees no longer fit their space. This is why research and experience are important tools to help with planting the right plant in the right place. I obviously have to practice what I preach instead of pushing that envelope! Being a plant nut, I should know better, but sometimes you fall in love and all common sense goes out the window. I’m chalking it up to a learning experience… and I’ll leave it at that! Cheers, Amanda I had an ugly lawn, but not anymore. When I moved in to my husband’s house he had for many years, it was obvious that the lawn was not his priority. He liked the dandelions “those little pretty yellow flowers”, growing among the sparse growth. I moved in anyway… The lawn was definitely neglected. It was rarely mowed and not fertilized nor watered. Dandelions dallied in the sunny spots, while moss meandered in the shady parts. I really didn’t think I could save the grass as there wasn’t much of it to save; just a few blades here and there. I was wrong. Digging up the dandelions as well as all the other weeds was a chore. It was an ongoing task for me and for anyone that was willing to take up the challenge, which were few and far between I must say. We didn’t get them all out, but we gave them a run for their money… so to speak. Since the dandelions were so utterly happy living in our lawn, I had to question why. What soil conditions do these pretty little yellow wildflowers like? Soil that lacks nitrogen and calcium are a dream come true for them, but those conditions are opposite to what grass likes. Turf grasses prefer nitrogen and calcium with a pH of 6.0 to 6.8. Our soil is also compacted, which is typical for clay soils. Grass plants roots are hindered by the compaction, but dandelions and moss don’t seem to mind it at all. One of the first things we did was cut the grass more often so only 1/3 of the grass blade was removed at each mowing. The mower was also set high at 3 inches. This provides the plants with more food and longer roots. The clippings were left on the lawn and not bagged as this provides nitrogen and other goodies as they decompose into the soil below reducing the need for fertilizers. It was watered in the summer to keep the crowns alive as dead crowns mean dead grass. For those areas that are not conducive to growing grass, don’t bother trying. I had two areas I gave up on. Moss loved the wet, shady acid conditions against the house so much so that I converted into a shade garden. Grass also couldn’t grow under the two false cypress due to all the leaf litter that smothered the grass, produced too much shade and sucked the moisture out of the ground. That too was converted into a shade garden. Once the maintenance practices changed to suit the grass and not the weeds and the moss, the grass were quite relieved and responded favourably. It didn’t happen overnight. It didn’t happen in a month or a growing season. It took a year – at least. One has to be patient. Think of it this way, it took years of neglect for the grass to succumb. It has been about 10 years since I inherited this dandelion lawn and it has improved year after year. It looks pretty good now. It isn’t perfect, but it is green and lush with only just a few little yellow wild flowers. Cheers, Amanda  Before  After |